Showing posts with label Huawei Malaysia. Show all posts

Sunset Smartphonegraphy Tips featuring Huawei P10 Plus


Sunset photography, it may seem easy where you simply point the smartphone camera at the setting sun and press the shutter button. However, with a few extra steps, your shot will look a lot more attractive than the regular run-and-gun photos.

Read on for a few quick smartphonegraphy tips on how to take really nice looking sunset landscape image.


HDR Mode

Enable HDR mode

As the camera app on our smartphones is getting smarter generation by generation, many of us started to rely on the Auto mode on the app for our everyday shots. While you may get really nice looking photographs with the default mode but a simple switch on the camera settings will drastically improve the look and feel of the final image.

 Auto mode, not impressed. Dark foreground and boring colours.

The problem with the auto mode is the brightness adjustment. Since we are shooting a landscape with bright sunlight in the background, the camera app will tend to underexpose the foreground objects.

HDR mode

With HDR mode enabled, the photo now looks a lot different from the previous one. What the camera app did is combining several shots with different exposure to produce a final image with equally bright foreground and background.

Colour modes

 Pick a colour profile and make the colours pop.

When you shoot under bright sunlight, the colours would seem washed out and doesn't look that interesting. While third-party photo editing apps can adjust the colour saturation, but most of the camera apps out there supports custom colour profile so that you can capture the photo you have in your mind.


The green and yellow are a lot more vivid which in turn, makes the whole photo looks more lively.

Sunset Smartphonegraphy Gallery:


Now your camera is ready for some action, what's left is to pick the best location and time for the shot. As photography is a form of an individual's artistic expression, you can actually go crazy with your ideas and concept for the shot.


Smartphone Photography Manual Mode Cheat Sheet: featuring Huawei P10 Plus


Have you ever wondered what it means by manual or semi-manual photography? As most of the smartphone nowadays comes with Manual mode supported, many users are still left dumbfounded by all the technical terms displayed on the screen.

In this article, I will provide you with a really simple crash course on how to get familiar with manual mode photography on your smartphone.


Getting Started - Enable Manual Mode


Most of the smartphones nowadays have manual mode built into their camera app. Different camera apps have different naming to it, some call it Manual Mode and some call it Pro Mode.

The Basics - Exposure Triangle

Aperture

20-MP Monochrome + 12-MP RGB sensor with Leica SUMMILUX-H f/1.8 lens
Pretty sure you have come across the above specification where it mentioned the lens has the aperture value of f/1.8, f/2.2 or any other values.
  • Aperture value means the size of the lens opening which allows light to pass through and reach the sensor.
  • A smaller value means larger aperture opening, hence more light reach the sensor; A higher value means smaller aperture opening, hence less light reach the sensor.
  • Large aperture opening creates an image with a large separation between the front subject and background.
  • For example:
    • f/1.8 aperture allows more light to pass through compared to f/2.4 aperture.
Since smartphone lenses have no moving parts, hence the aperture itself is fixed. Thanks to the dual camera technology, we can now simulate the depth of field effect using the software. For example, the Huawei P10 Plus camera comes with Leica Dual Camera 2.0 with a large f/1.8 aperture lens which allows you to capture more light.


ISO


The ISO value represents the light sensitivity of the camera sensor.
  • Lower ISO value means the sensor is less sensitive to lightHigher ISO value means the sensor is more sensitive to light.
  • Increasing ISO value allows capturing a brighter photo in low light situation.
  • The disadvantage of high ISO is that the photo can be grainy and "noisy".
  • For example:
    • ISO 100 is less sensitive to light, but the produced photo is cleaner and less noise.
    • Meanwhile, ISO 3200 is more sensitive to light, but the produced photo is grainy and more noise.


Shutter Speed


The shutter speed determines the amount of time that the sensor is exposed to light. Let's take this example, you open the water tap and fill the first cup for 1 second and second cup for 5 seconds. Obviously, the second cup would have more water. The same theory applies to the shutter speed and light.
  • Slower shutter speed allows the sensor to capture more light; Faster shutter speed allows the sensor to capture less light.
  • Slow shutter speed may cause blur photos; Fast shutter speed can capture fast action without motion blur.
  • For example:
    • Shutter speed of 1/8 seconds produces a balanced brightness photo of a dimly lit indoor scenario. However, the photo is blurry due to subject's movement or shaky hands.
    • Shutter speed of 1/250 seconds or higher can freeze motion. However, you might need to turn up the ISO as the photo can be very dark depending on the lighting situation.


Final Words: Mastering The Exposure Triangle

Now you have learned the basics of the exposure triangle. To recap, let's have a sample scenario where you want to photograph a beautiful scenery in front of you. After pressing the shutter button, then you noticed the image is too dark. Given that the aperture is fixed on the smartphone camera's lens, you either have to decrease the shutter speed or increase the ISO in order to increase the brightness of the photo.

If you decrease the shutter speed but found out the photo is now blurry, then you have to adjust back the shutter speed and increase the ISO instead. In this way, you will find the balance between the Aperture, Shutter speed and ISO. Therefore they are called the Exposure Triangle.

Auto mode Photography with Huawei P10 Plus

Huawei P10 Plus Auto Mode Photography

Do you still remember the days when everyone is rocking a VGA resolution camera on their feature phones? Well, that didn't stop us from taking photos or videos of something that we can barely recognise even on a computer, let alone through the low-resolution display on a feature phone. That shows how the people love taking photos because a picture is worth a thousand words.

Today, thanks to the advancement of the photography technology, smartphones are now capable of taking great looking photographs while keeping the size in check. In fact, a smartphone's camera capabilities have become one of the important purchase decision factors for the buyers, be it if they are a photography enthusiast or someone who needs a family camera. The Huawei P series smartphones are designed to meet the demands of these consumers. Co-engineered with world's renowned camera manufacturer, Leica, the new Huawei P10 and P10 Plus Leica Dual camera 2.0 makes sure that everyone can spend the least effort in taking stunning photographs.


What is Leica Dual Camera 2.0?

The first generation Leica Dual Camera was introduced alongside the Huawei P9 and P9 Plus. Co-engineered and certified by German camera manufacturer, Leica, the camera has received an overwhelming response from the consumers and Huawei manage to ship over 10 millions of P9 smartphones at the end of 2016.

The dual camera is consists of a colour sensor and a monochrome sensor. Each of the sensors has their own function in order to produce an amazing looking photograph. The moment you tap on the shutter button, the colour sensor would record the colour details then combined with the contrast details from the monochrome sensor to form a final image that is vivid in colours and sharp in details.

The second generation of the Leica Dual Camera is even better as Huawei upgrades the monochrome sensor from 12-megapixel to 20-megapixel, which means the photos are will have richer details than ever. Apart from sensor upgrade, the Huawei P10 Plus also received the lens upgrade, featuring a f/1.8 SUMMILUX-H lens.

Auto mode?

Check the image caption and description on how I took each of the following photos using the Huawei P10 Plus using only auto mode. Some photos do not have the Huawei watermark because I'm not a fan of slapping a big distracting text on a potentially good photograph. Nevertheless, I hope you can learn some tips on shooting auto mode with Huawei P10 and P10 Plus.

Landscape


Landscape - 1/2100s f/1.8 ISO50, Auto mode, HDR mode ON, Vivid Colour

This photo was taken sometime around 2 pm when the sun is extremely bright. The bright sun is not always good because the photo has the tendency to be overblown with bright lights hence losing the contrast. Turning on the HDR mode will help in capturing the details in the bright spot as well as in the shadows. Turn on vivid colour mode to highlight the vibrant blue sky.

If you want to showcase the vast skyline, here's a quick tip - make sure the sky takes up 2/3 of the image.
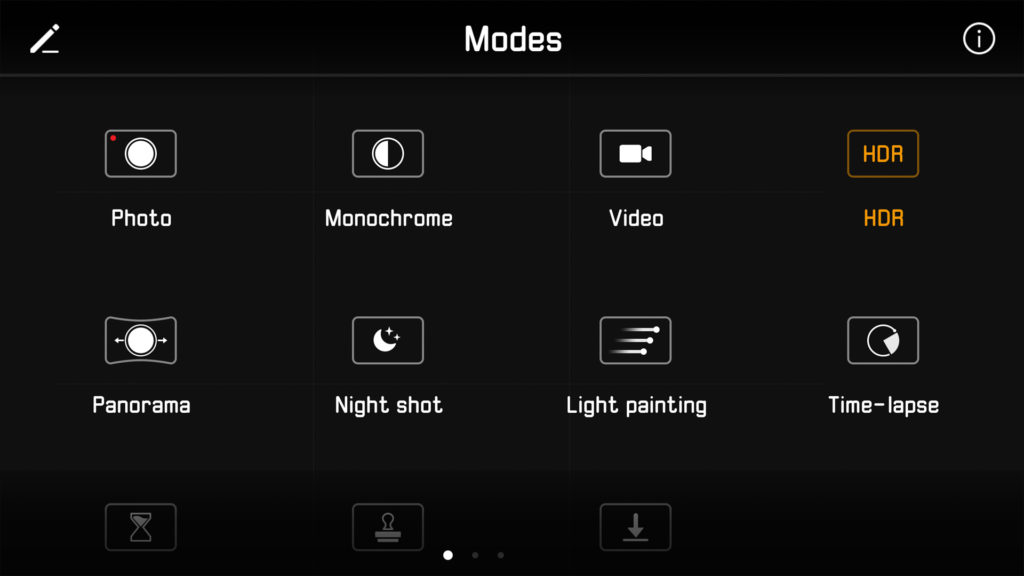

HDR mode

The HDR mode can be found in the shooting modes menu by swiping to the right.

Close-up (Macro)


Close up - 1/50s f/1.8 ISO160, Auto mode

The camera also has a fairly close focusing range, around 4 cm. This photo of the iced coffee was taken by using the tap to focus function.
  1. Move the camera close to the subject.
  2. Tap on the display to focus.
  3. Snap the photo.
At this range, you can even produce a beautiful and detailed image with natural bokeh.

Extra tips for you is that, make sure the light source is coming from either left or right to further highlight the structure and texture of the subject.

Low light - Monochrome


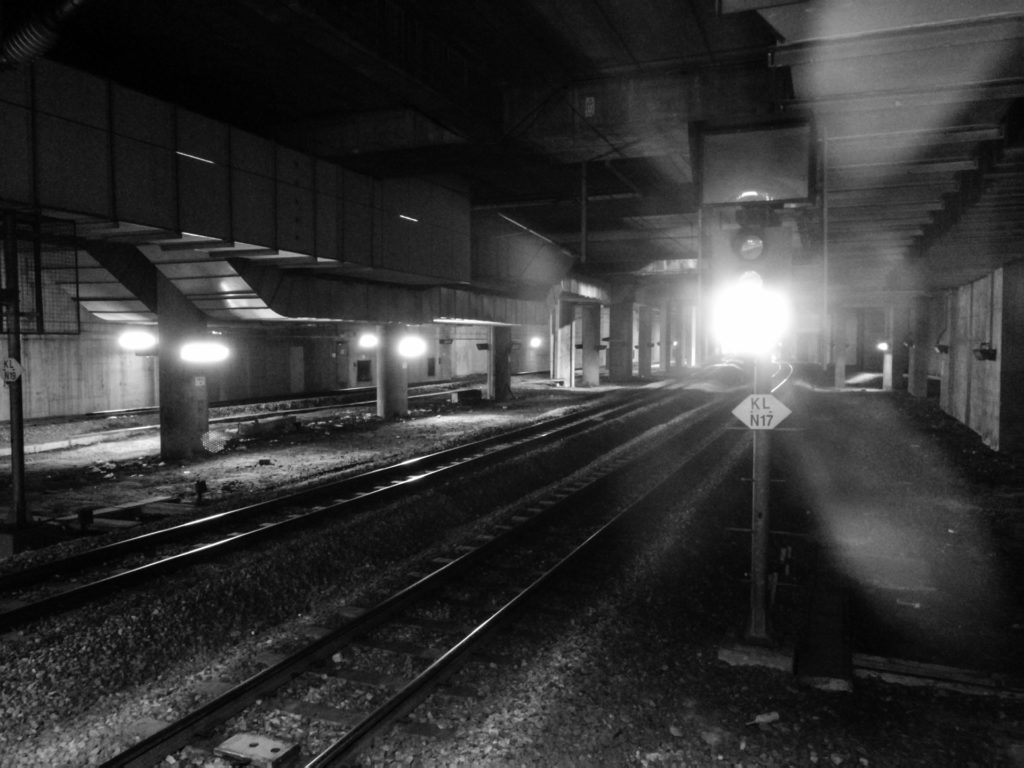
1/4s f/1.8 ISO1250, Auto mode, Monochrome mode

This photo is to showcase the eerie mood of the underground railway. I first took this photo in colour mode but found that the image does not carry enough "eerieness" because it is simply too dark. Upon switching to monochrome mode, I am surprised with the details the sensor is able to pick up. To reduce the chance of blurred image due to slow shutter speed in low light situation, I took the photo while having the phone supported against the handlebar.


Monochrome mode

The Monochrome mode can be found in the shooting modes menu by swiping to the right.

Low light - Colour


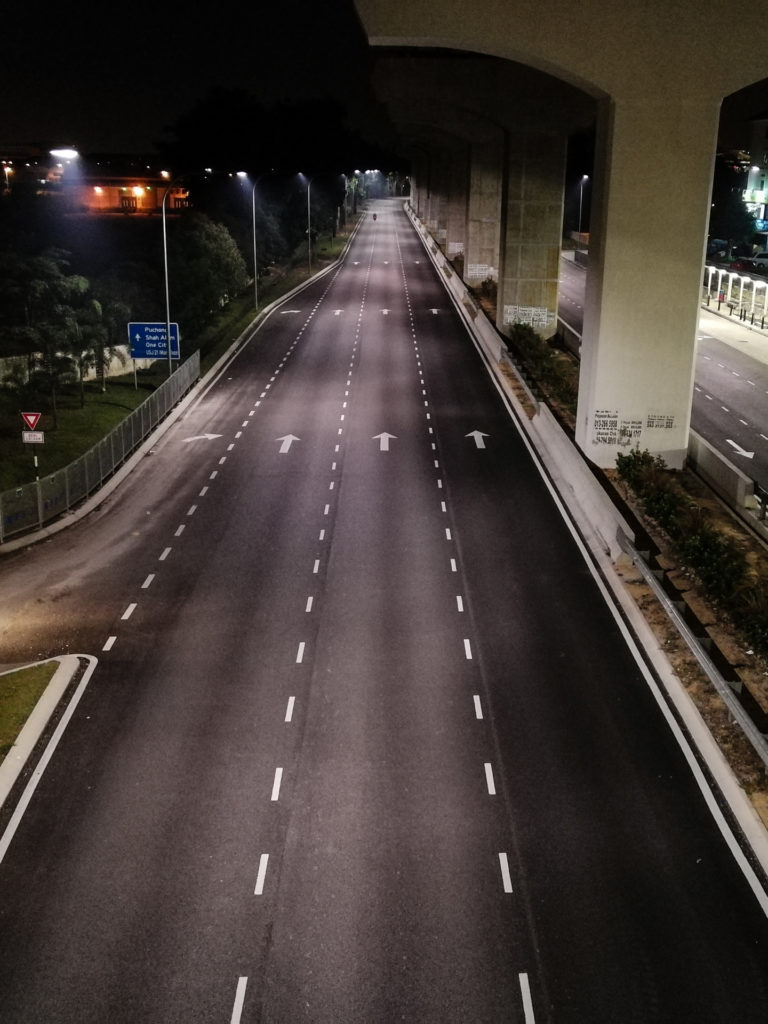
1/17s f/1.8 ISO1250, Auto mode

This low light shot of the night street is also done with the support of the handlebar. Low light shots are usually very tricky to pull off because most of the time the smartphone camera will struggle to balance between shutter speed and sensor sensitivity. Due to slow shutter speed, the shots we get are usually shaky and blur. If you don't carry around a smartphone tripod, just look for a sturdy surface to support the phone when taking a photo.

Portrait Mode


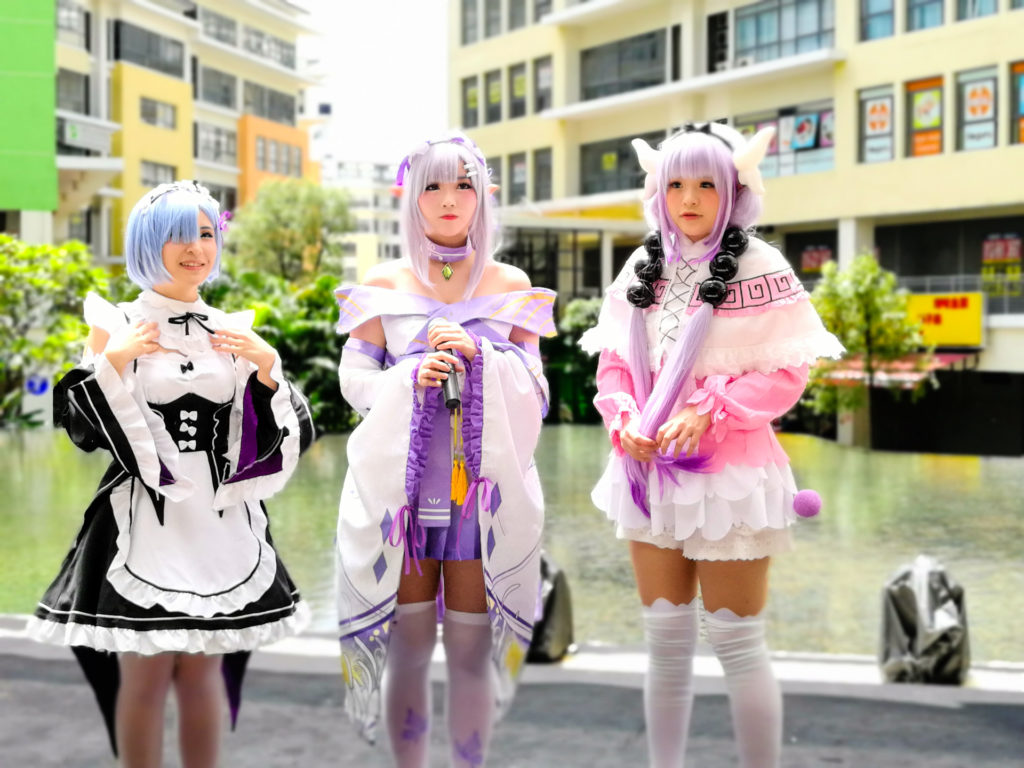
1/560s f/1.8 ISO50, Auto mode, Portrait mode ON

Moving on to the Huawei Leica's Portrait mode. This feature is the latest addition to the Huawei P10 family which you can't find in the P9 or the P9 Plus. Most of the time, the camera app will determine the best brightness level depending on the average brightness of the scene, the result usually ends with either the face of the subject is too dark or too bright.

The Huawei Leica's Portrait mode is a special algorithm where it tracks the human face in the scene and adjusts the brightness of the photo so that the face of your subject is well lit and looks good. At the same time, the camera app will also apply the wide aperture effect to produce a dreamy background that further highlights your subject.
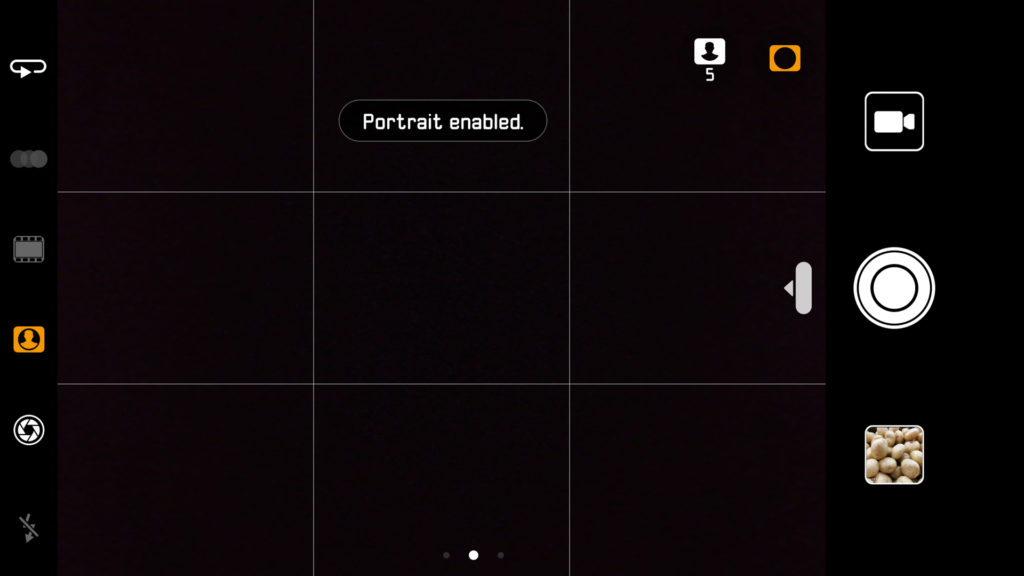

Portrait mode

The Portrait mode is easily accessible from the small icon at the left.

Huawei P10 Plus Photo Gallery

Click on the image to load the larger image.